A Guide to Thetford Toilet Installation: Perfect for Your RV Bathroom
Toilet installation can seem like a daunting task, especially when it comes to finding the right fit for your RV. Whether you’re installing a new toilet from scratch or replacing an old toilet, the Thetford Cassette Toilet C223-CS emerges as a leading choice for those in search of a reliable, compact, and easy-to-install option. This model not only offers the convenience of a portable waste tank but also features an innovative design tailored for the tight spaces of an RV.
Why Choose the Thetford C223-CS as Your RV Toilet?
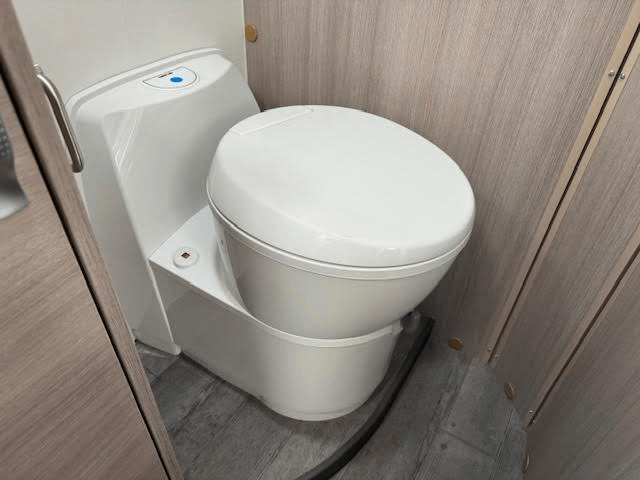
The decision to install a Thetford toilet in your RV comes with numerous benefits. The C223-CS model, in particular, boasts a revolving toilet bowl that can turn 180 degrees on its base, locking into place with a simple press down on the seat. Constructed from a lightweight plastic material, this toilet is designed for ease of use, featuring an electric flush system. Its compact dimensions (534 x 394 x 580 mm) and comfortable sitting height of 492 mm make it an ideal choice for the confined spaces of an RV. Additionally, the toilet has a net weight of just 7.2 kg and includes an 18-litre waste tank that can be easily removed thanks to the installation of the Service Door Model 3, which is both water-resistant and UV-resistant.


Step-by-Step Guide to Installing the Thetford C223-CS
There’s no need to panic, the process of installing the Thetford Cassette Toilet C223-CS is surprisingly simple. Just follow these steps:
- Template Use: Using the supplied template that comes with the Thetford C223-CS, mark the holes for the wall bracket where you plan to install the toilet.
- Wall Bracket Installation: Secure the wall bracket inside the wall with three screws, allowing the toilet to hook onto this bracket.
- Toilet Placement: The toilet is placed and then secured to the floor with four stainless steel screws included in the package.
- Additional Security: For extra stability, apply Sikaflex 252i as an adhesive, though this is optional.
- Connect Water Hose: Attach the water hose to the water supply.
- Electrical Setup: Complete the electrical connections for the flush system.
- Sealing: Seal the base of the toilet with silicone to prevent leaks.
Choosing the Right Toilet for Your RV
Selecting the right toilet for your RV involves considering various factors, including space, functionality, and ease of maintenance. The Thetford Cassette Toilet C223-CS meets these criteria, offering a practical solution for RV owners. Its compact design, easy installation process, and user-friendly features make it an excellent choice for those looking to upgrade their RV’s bathroom facilities.
For those still on the fence about which toilet solution is best for their mobile home, exploring different options is key. The Thetford range provides a variety of models suited to different needs and preferences, ensuring that there’s a perfect match for everyone. Additionally, understanding the overall concept of a wet room or bathroom in an RV can provide further insights into how to maximise space and efficiency in your mobile living space.

Easy as Pie!
RV toilet installation doesn’t have to be complicated, especially with options like the Thetford Cassette Toilet C223-CS available. Its thoughtful design, ease of installation, and efficient use of space make it an ideal choice for RV owners looking to enhance their travel experience. By following this simple installation guide and considering your specific needs, you can ensure a comfortable and convenient bathroom setup in your RV.